Step 1: Cut your plywood if need be. Make a plan and work your plan to suit your rink width and fasten with 2″x4″s
as per picture below.
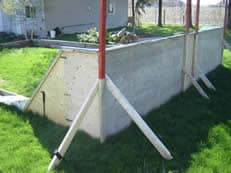
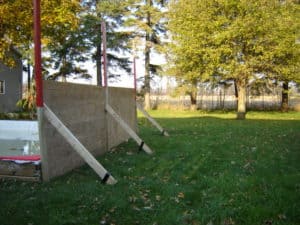
The Backboard Braces are the Series 2 Classic J-Brace. Order them separately for fastening your backboards with integrity and strength. These braces not included with the rink kit and not to be confused with the amazing 5 in 1 J-brace which are rink frame, rink building freedom included with 2200 to 9985 series rink kits. Shown just below in the fall…. our backyard backboard set up complete with Series 2 backboard Classic Steps 2&3: Stand it up using 2″ x 4″ s to hold your plywood in place and then fasten them together. Depending on the width you may need to do this in several sections. Then use 2″ x 4″ angle supports as shown to add integrity and strength.
Step 4 (Bonus):
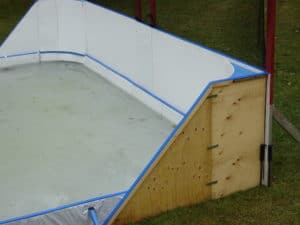
To add the wrap around section as shown above just prepare and assemble using 1 piece of plywood. Safety is paramount, so do cut your plywood, backboard wrap around, on a 45 degree angle as shown and support from exterior sides with 45 degree angle supports.