
Troubleshooting
Liner Protection
We have developed 4 different ways of protecting your liner. We will outline and review them here!
Order a liner one size bigger then you need and leave it with 1 fold (still folded) in the bottom of your rink lengthwise. Then create a 2nd fold width wise and lay it against your grass, the rink bottom at the deep end….. or vise a versa. Then fill with water. The water will hold “the fold” down as it fills. The water will turn to ice, you will skate and play and now you have extra liner saved for next year. The ice melts, you trim off the damaged part and “presto” you now have virgin poly that was hiding under your ice. If you typically need a 32′ wide order a 40′ wide, if you need a 25′ wide order a 32′ wide etc. Remember your 5′ of extra length as well to take care of your ends.
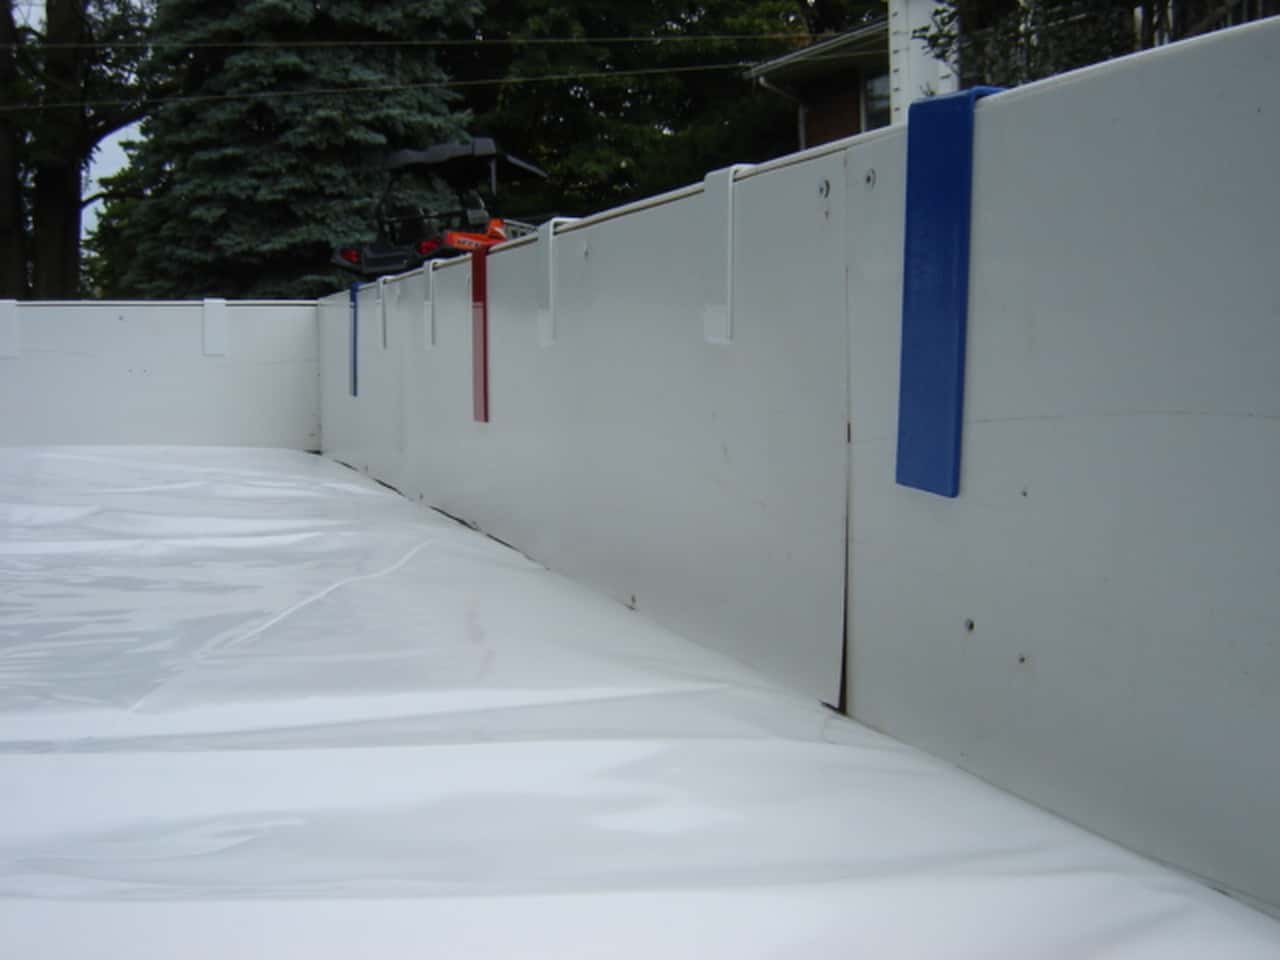
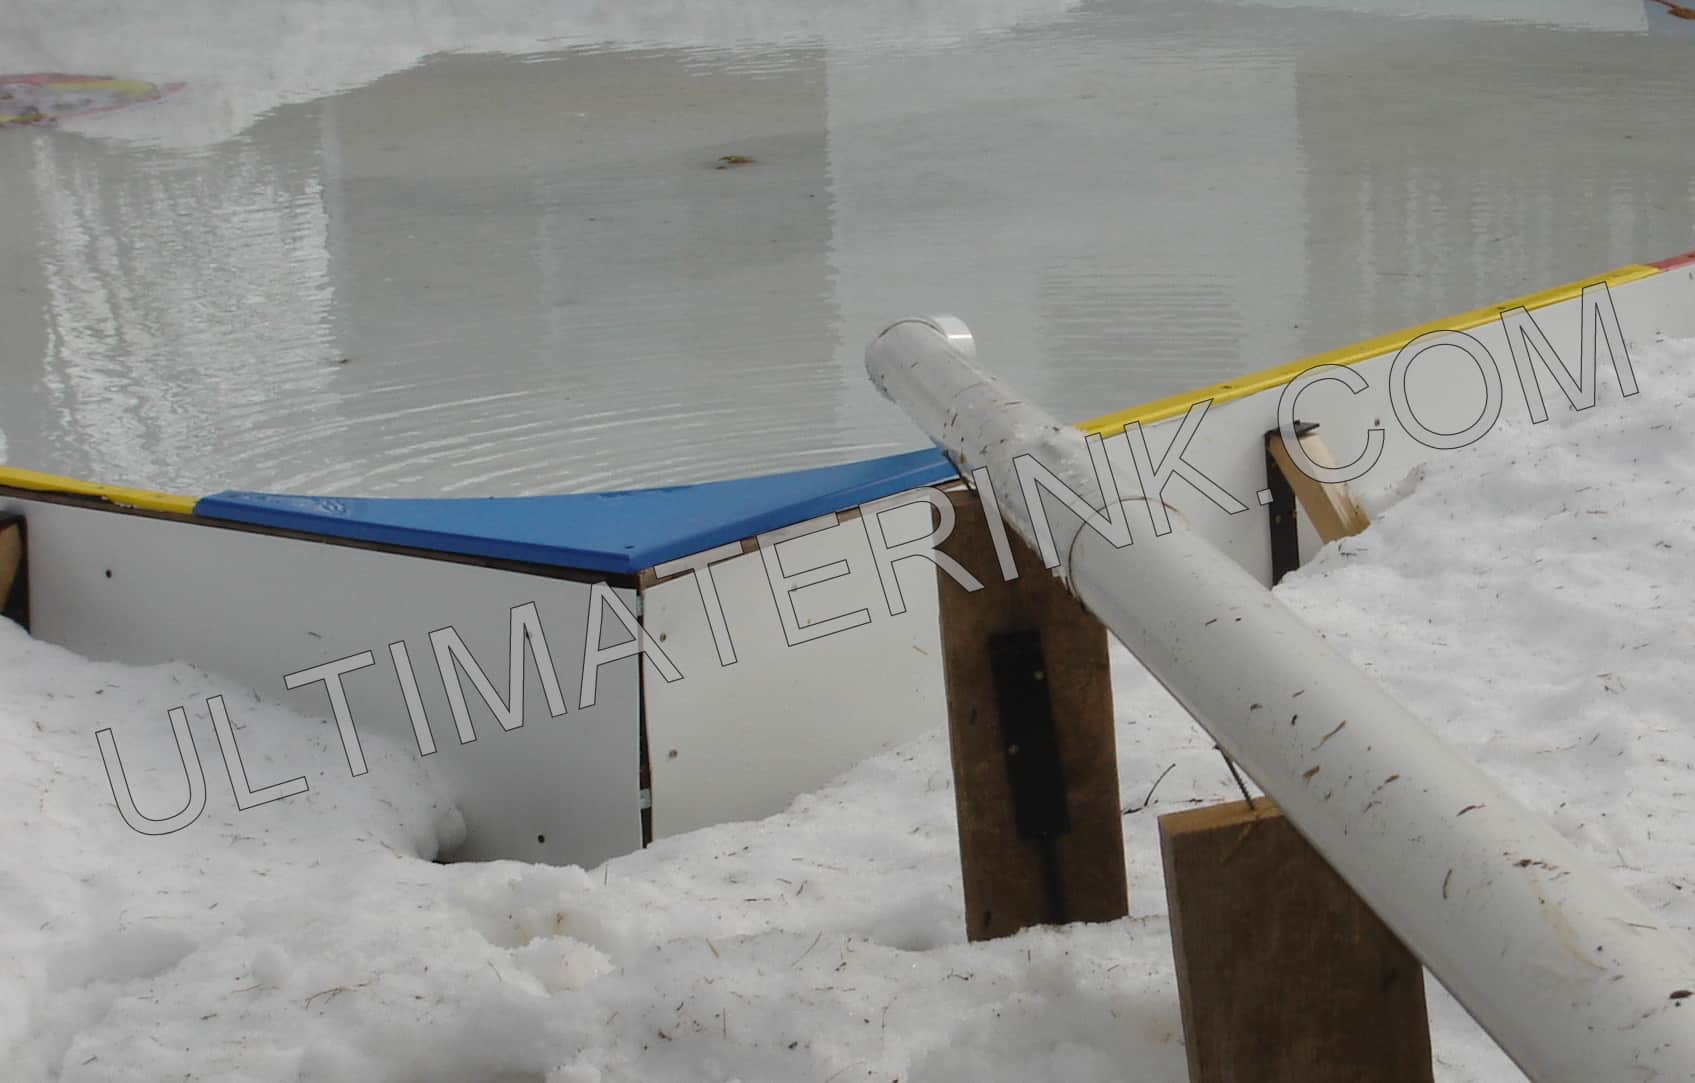
With the introduction of our 5 Way Rink Stake in 2005 and a slight name change it opened up the opportunity to advance the 5 in 1 Rink Stake to a liner placement and liner protection on the inside of your rink frame. The LPS (Liner Protection Kickplate) is your Ulti Mate of your LPS 1/8″ thick puckboard to your inner frame. Varying widths are manufactured and sold on a 50′ roll. This roll is then easy to ship across the country and line the inner rink frame/boards of your rink with a white hard surface that reflects the sunshine(heat) away from your rink while protecting it from damage. With this method you then improve your rink appearance and protect your liner. Your first step to Real Rinks for Real Yards! Practical and playful!!!
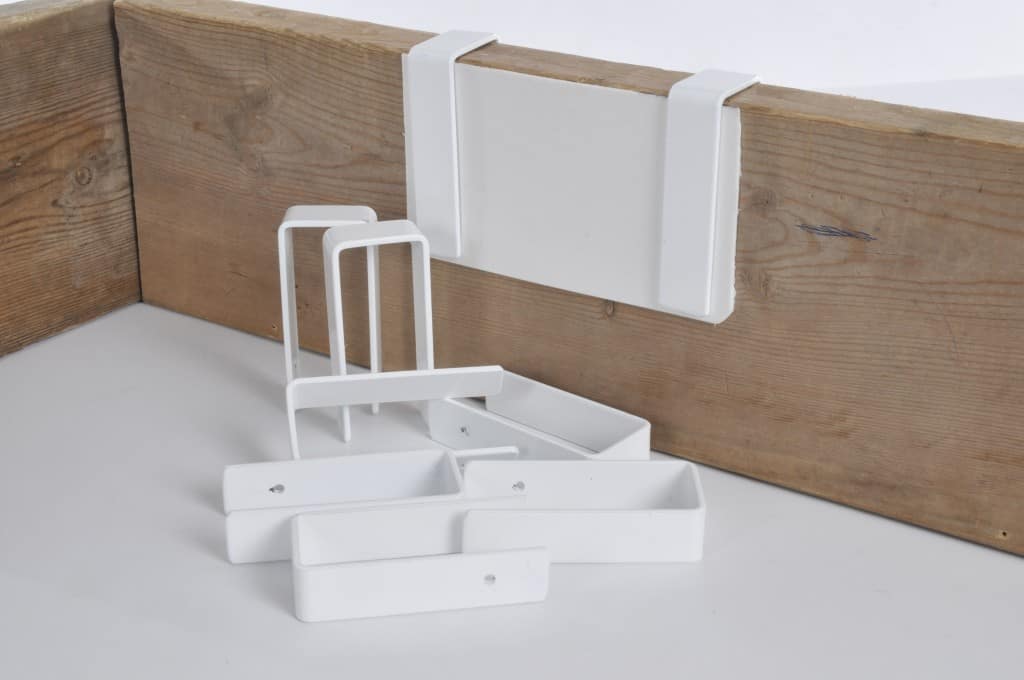
GripnGo’s Holding Liner Protection 
Red Line Blue Line GripnGo’s hold LPS in place at appropriate points. As seen in the 5 Way Rink Stake Video, last option with a dbl stack of boards and your liner wrapped over the first level and than adding 2nd level with LPS. The most unique way of installation of LPS (Liner protection kickplate) and is showing here with a LEVEL SITE for
Ulti Mate results. You will be able to place your LPS at any height on your upper frame and fasten with no puncture holes on your upper tier to cover most of your rink poly on lower tier.
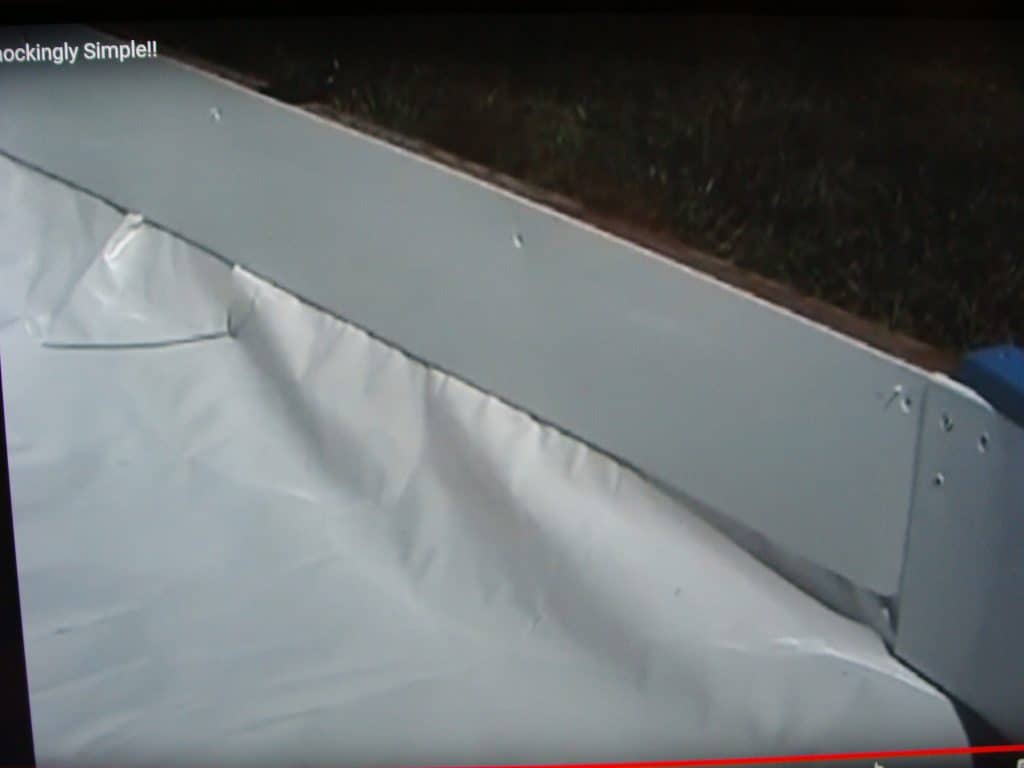
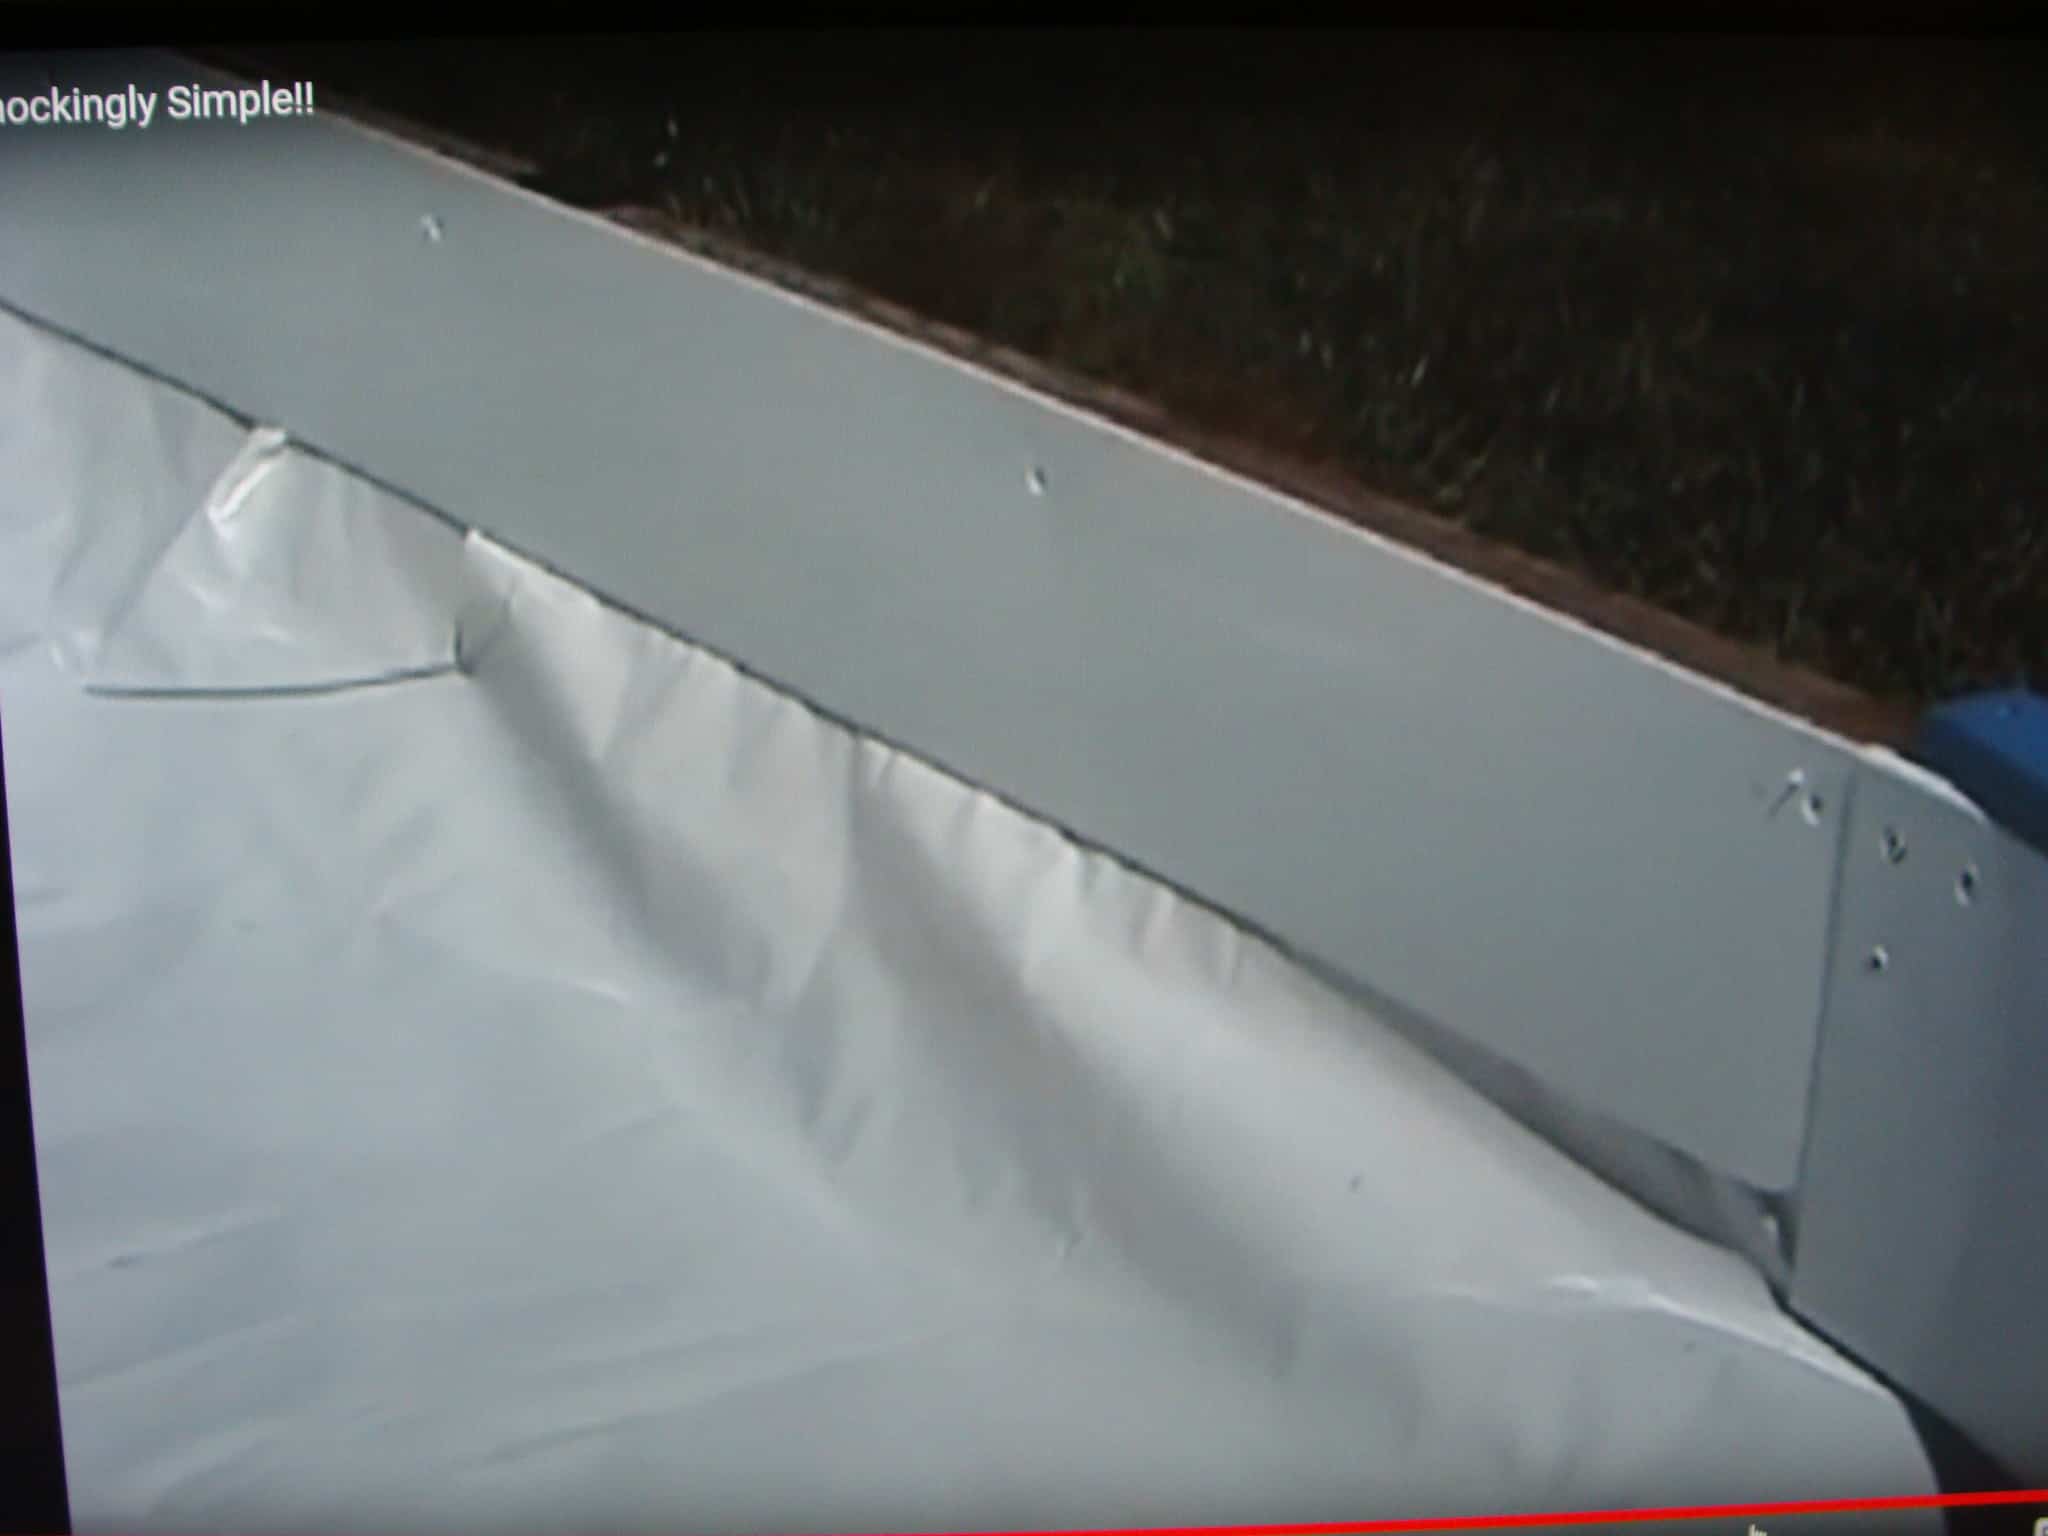
The liner tucks up and over the lower frame and the upper frame sits atop the lower. Liner Protection is fastened to the inside face of the upper frame and hangs below covering the lower frame and liner. All screws are then fastened into the upper frame avoiding all liner punctures. 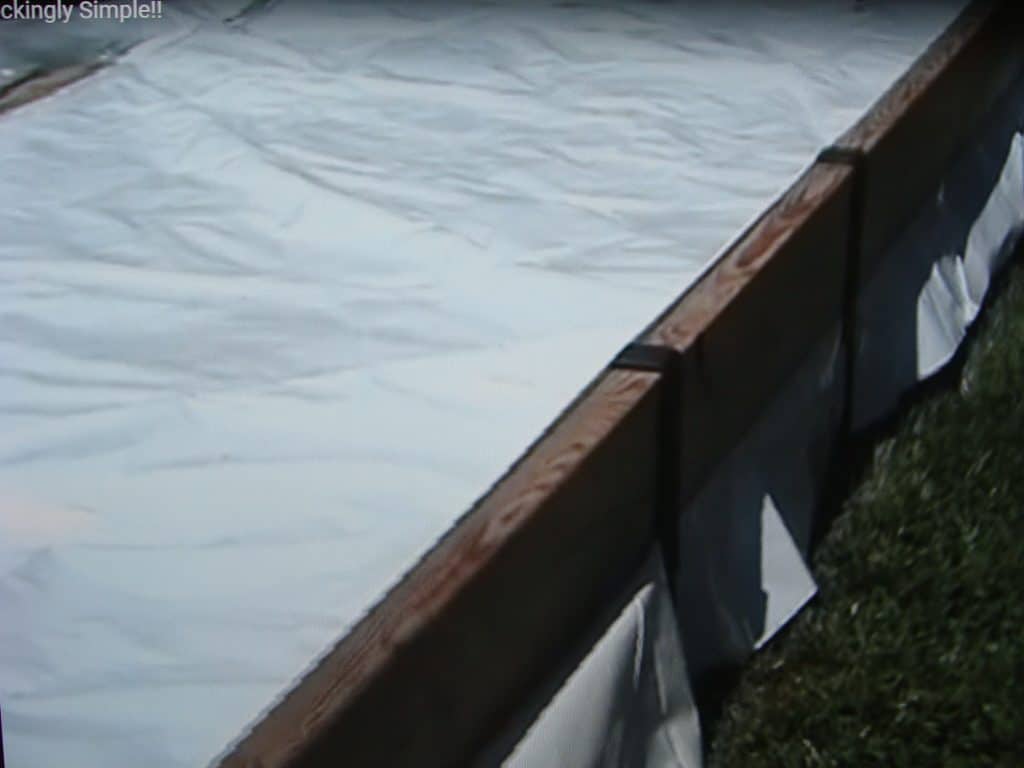
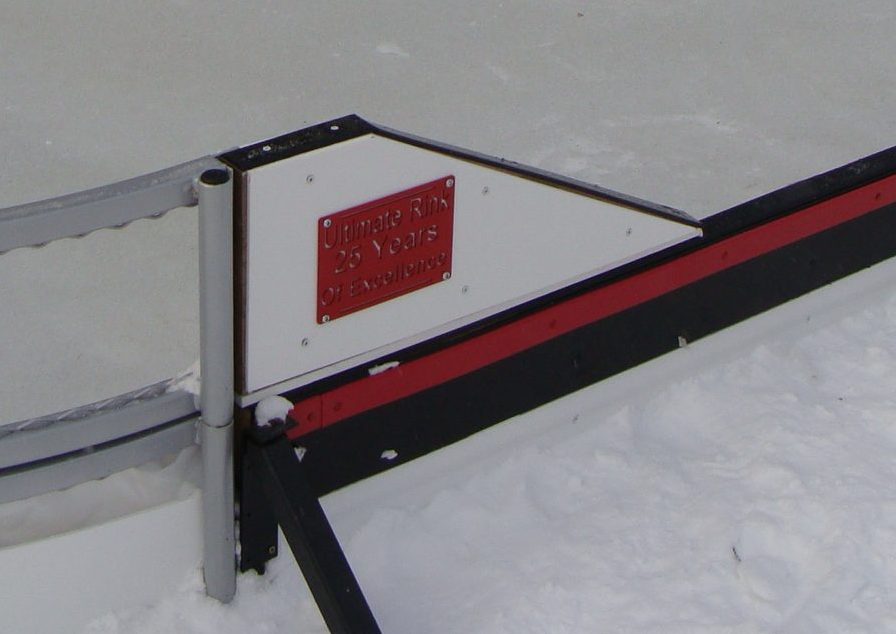
Outer perimeter view with liner showing between upper and lower framing. - The Tru Corners feature a built in Liner Protection Kickplate. Pro panels are made of 2 x 12’s (actual size 11 1/4″). The Liner Protection is built into your board system and this the creme de la creme. Once Pro panels are purchased they are removed with 4 screws per seam and the look is most definitely Pro. This is a Presto Install item. Assemble the rink frame pieces and corners in about an hour with screws depending on size, then……lay your liner in place inside your frame making sure you have enough liner height to accommodate the water level you need. (having 1 or 2 years experience with your site is best)Start your water flow assuming you have enough support for any deep water areas. (level sites are important for this application and assembly)
Add Liner Protection Kickplate in yellow as shown below or white Kickplate at your water/ice level sandwiching the liner between creating protection for you liner.
Step over sides and Tru Corners highlite this 2017 edition 


Environmental & Our Liner Facts
Here we are, 33 years since we started our fantastic backyard rink business. Thanks to you all for your support. It gives us great pride when every day we hear someone who says “you gotta call the team at Ultimate Rink”. Who says that? Other rink builders, your co-workers, your rink building neighbors and the guys on your rec team or the dads at the rink. Why? BETTER VALUE! and Knowledge! Our Ultimate Liner is easier to work with and you only need your rink to be filled once. Let’s face it! Why spend more. If, however you want to save it for reuse you can. Continually we speak to our rink builders that have used their liners for 3 years. Our Whitest White in the industry (at 80%) takes a skate blade or shovel the same way every other liner does. They all get cut and sliced and diced above the water line if unprotected. After 33 years, of trying them all including 4 mil, 6 mil and 7 mil, we choose to stick with our hair shy less than 6 mil product as it’s the BEST VALUE PERIOD! This was done after careful consideration and thoroughly researching our options many, many years ago. Our mission was to supply BETTER VALUE!!! And we have now done that for 33 years.
Another Ultimate Rink first! This is all about best practices to reduce your environmental impact after enjoying your ultimate rink.
After the amazing rink year we had last year and the environmental concerns we all have, the number of inquiries asking about recycling liners continues to grow. We have done some home work and here are our suggestions.
- Save your liner. There so many possibilities for smaller liners. Not so many for larger liners due simply to size. Liner Protection Options
- Our rink poly is pure 100% polyethylene and the whitest available on the market today!
- It rates as a no. 4 on the chart of recycle materials. The no. 4 category indicates a recyclable material.
- Your recycle program driver may never know what the number is and therefore it may be wise to mark your liner accordingly with a permanent marker as follows…..”Recycle material no.4″
- Throwing the entire liner in your recycle bin would be impossible so we recommend the following a) If you have a blue box program, cut in it strips approx 4′ wide by 30 feet long. Fold it lengthwise and roll it up as tight and as small as possible. Do this every week until you have disposed of it. This allows your recycle guys to handle it professionally. b) if you have a big road side disposal bin then you can do the same but perhaps place several rolled up sections in each pick up.
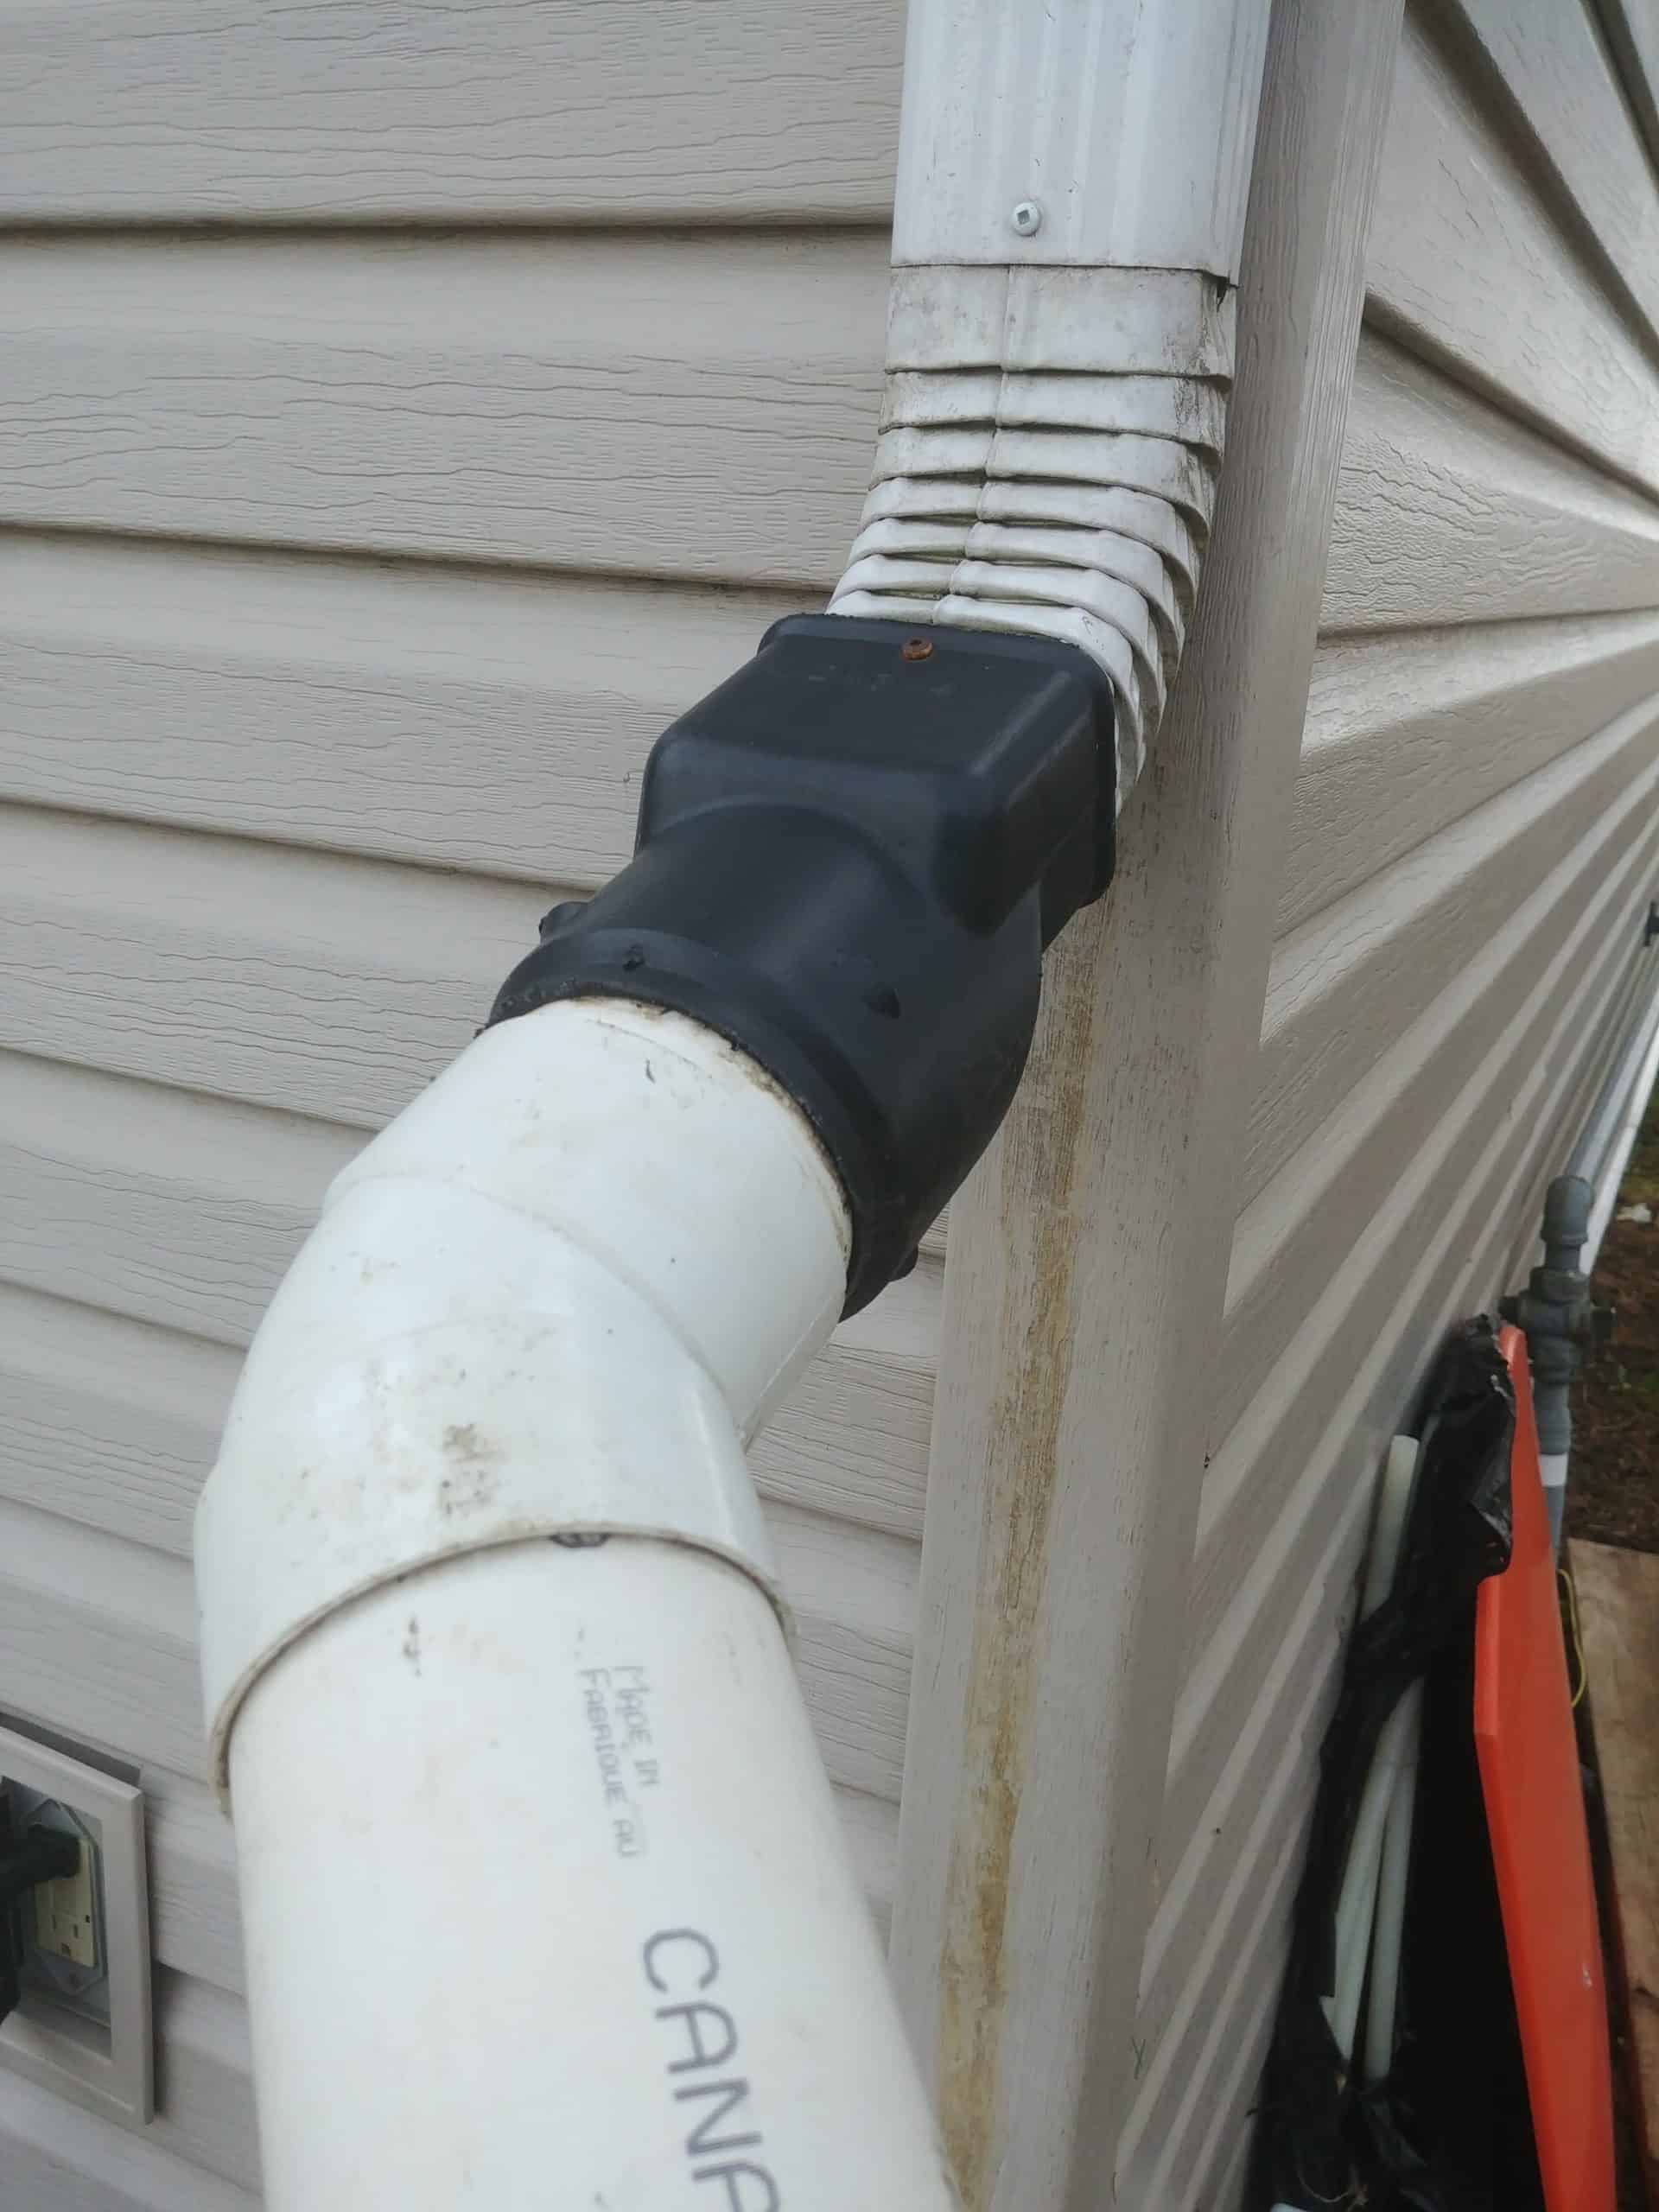
This is the fitting to hook up a round piece of pipe. If you wish to use the standard downspout, fittings are available at most DIY stores.
Lakes, Ponds, Rivers and Your Rink Maintenance
Here are several scenarios you may come across after or during your rink building process.
Firstly if you can not walk on your rink then do not attempt. A step test is the best way of checking to see if you can walk on it. Start in the shallow area of you rink. If you can’t walk on it there then you can’t walk on it anywhere. Breaking through your surface and slicing your liner with an ice chunk is not conducive to success or your sanity. Just sayin!
If snow is in the forecast and it has been mild with rain, best practice is to eliminate any snow that falls into the rain soaked surface ASAP as soon as you can. Big rinks are a little different to deal with due to sheer size.
Simply put, best practice is to remove all slush and snow previous to any work you may do. Do it previous to a refreeze. See below “weather fluctuations” for more info.
Huge snowfall before your rink has frozen…(the nemesis of the well prepared rink builder)
FIRSTLY…..Let’s start by saying that you should monitor any weather front moving in to the area and how much snow it is bringing with it. Snow is good as it will freeze faster…..but lot’s of snow is not. If you are expecting more than 5″ then best to hold off filling your rink frame with water. Too much snow will fill in your water and rise above the top causing and create the below scenario.
If you can’t walk on it: With a snow blanket and slush this always poses a problem. If your rink box is filled with slush and a snow blanket it won’t freeze. You must do the following….. Remember, the reason why sled dogs sleep under the snow is because it does not freeze there. They won’t freeze and neither will your water turn to ice…..DO NOT WALK ON IT PERIOD!!!!!!!!! DO NOT WALK ON IT!!!! Do not walk on it!!! Just say no….
- Drain or siphon off up to half the water at your discretion and with it, some of the melting snow.
- Then re fill your rink box with new fresh tap water which in turn will melt most of the snow. This will depend on how much snow you actually have however and how much warmer your tap water is. Now you have a new starting point and a new freezing will take place. Do not try to shovel out your ice or snow accumulation due to the potential you will snag your liner and puncture it. This would be the worst case scenario next to walking on your surface and crashing through jamming your ice chunks into the liner and slicing it open.
- Monitoring the weather temps will be a good plan. You are wanting to do this when it starts to get cold to take advantage of the new weather front moving in and the freezing temps that come with it. Your tap water varies in temperature but in the city it could be 5-10 degrees therefore taking hours to fall to the proper temperatures for freezing.
- Lastly if you still have some floating snow don’t worry. As long as most of your surface is water it will freeze to ice and when frozen you will be able to walk on it and work on those snow mound areas with hot water and the great steel edge shovel or scraper you may have. It won’t be long and you will have your rink in skating/hockey shape. Videos are available for you to view and to assist you with your rink maintenance. Go to Videos
Pond Rinks, River Rinks, Lakes
Firstly let’s just clarify that what we are about to discuss regarding the resurfacing of your lake rink, river rink or pond rink will be your decision and solely your decision and we take no responsibility for your actions to resurface your rink at any time or any place. The following is guidance based on ice that is 8″-12″ thick and based on weather conditions at the time of your flood resurfacing project that would support your travel to your ice rink site on pond, river or lake.
Basic water supplies on ponds, rivers and lakes are usually from below the ice. This can create a problem. Warmer, fast moving water will create unstable conditions and you should not be building your rink in an area of this nature. But let’s assume your rink is situated in a safe quiet natural area. Resurfacing problems arise when the water temps below the ice are the same temps as the ice itself and those issues are qualified in the following text below.
Air temperatures at single digit Fahrenheit or minus teen Centigrade is very very cold.
When you flood/resurface with this very cold water pumped from below the ice, it sits on top of your ice rink surface and does not bond to the ice itself due to ultra cold temps. YES it will freeze but you need a bond to the existing ice surface to prevent shaling. Shaling is a separation of the new thin flood layer on top of the existing 8″-12″ thick ice. Shaling is caused by the skating action on your ice surface that has not bonded creating ruts and grooves and a dangerous skating surface that becomes a major problem. In our opinion, it is not worth resurfacing if the surface, after use, becomes dangerous. What do you do then? There are 2 solutions to this potential problem however. Keep Reading!!
Solution 1. Wait till temps become mild if you are pumping your ice resurfacing water from below the skating surface. The cold water pumped from below will likely now bond to the existing ice surface. When the sun is shining the power to melt and warm is exceptional and the bond likely becomes real.
Solution 2. Use a hose and water supply from a well or from a tap in your cottage or home as most water drawn from below ground have temps above zero therefore allowing a natural bond to exist. Please note that if your are pumping water from the lake or river to the home and back to the rink this may not be ideal temps for proper ice resurfacing due to the fact they originally come from the ultra cold lake or river bottom.
Summary: Regardless of your rink size the basic pond, river and lake resurfacing techniques are the same.
Air temperatures at single digit Fahrenheit or minus teen Centigrade is very cold and may not be conducive to successful ice rink resurfacing when using ultra cold water on ultra cold ice.
“Weather Fluctuations”
Windy Conditions and “The Hot Mop”
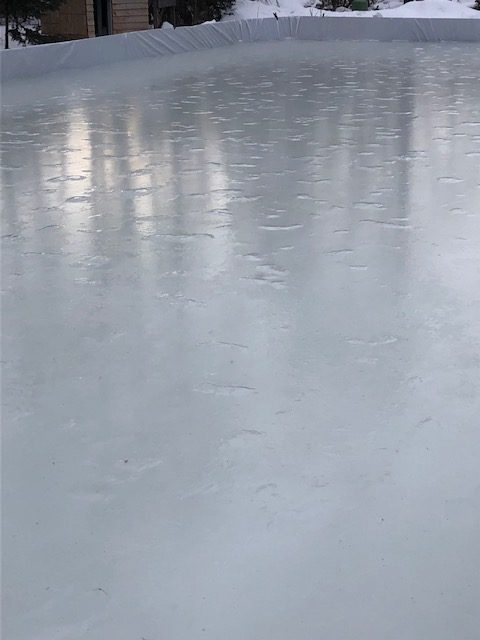
The picture below features one of the most frequent repair jobs the average rink builder were come across. Simply stated…a bumpy surface most often caused during temperature fluctuations with wind playing a roll. Snow blown from the wind into wet surfaces accumulates and freezes in bumps as shown on Kindra’s rink..
NO FRUSTRATION is the goal here because it can be. Easy repair to your surface in a reasonably quick and painless time line is the goal. Let’s face it we’ve got better things to do. Yes you can bring out the torch (good for several small bumps) but as you can see that would take you a long time when it comes to helping out Kindra’s 40′ x 60′ ice surface. She stayed calm and we walked her through this process. It’s incredibly simple. Get your Ultimate Flooder out with your towel and do the “Hot Mop” (Kindra’s term) We have seen full blown, massive destruction of a rink surface and 3 “Hot Mop” floods taking over 30 minutes each had surface back on track. Kindra did 7 faster “Hot Mops” and the below image was her perfect results.
Good Luck and as always we are happy to hear of your families journey through winters exploring the world of your Ultimate Rink.